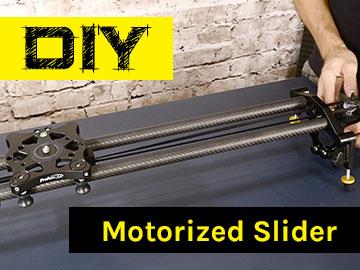
Ever since the Slideways Slider was released, I've wanted to motorize it. On my first attempt, I hooked up the same motor and joystick combo from our TigerTilt Motorized Head. And while it worked great, I wanted something automatic and easier to install and remove. Of course, I also wanted to make this an inexpensive project. So in this video, you can see all of the components I used as well as footage I captured with my DIY motorized Slideways slider. I go into detail on all the steps necessary to build your own.
I can easily see myself using this for a long time to come. The subtle movement adds a great deal to regular time lapses, and I was pleasantly surprised how well it captured shots in real time; a great tool if you're a one-man show. It's a great alternative to more expensive motion control units although I wouldn't expect it to perform the same with heavier loads. In my tests, I never had more than 5 pounds on the slider. As I mentioned, the "Time-Lapse" setting did not work with the load applied. I'll keep playing with it and update this post when and if I find a limit to the "Normal" and "Fast" speeds.
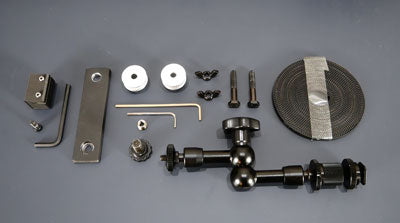
Components Used
If you're interested in building this, we have a kit available as shown in the video. It's only $59 and available here. It includes everything needed except for the motor. This kit is designed to work with the Slideways Carbon Fiber Slider.
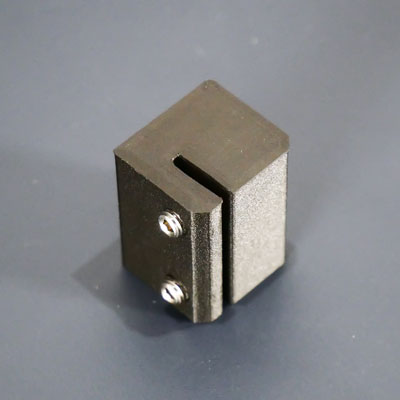
3D Printable Part File
For those interested in the 3D part, download it here as an STL file. Remember, you'll need to thread the 3 holes using a #10-32 tap. Be careful not to over-thread the part as plastic components may break. When printing the file, use thick walls to create enough material for the threads.
Full list of parts used
Slider: http://proam.us/slideways
Kit w/o Motor: http://proam.us/diyslidekit
3D Part File: http://proam.us/3dslider
Articulating Arm: http://proam.us/arm
Motor: http://amzn.to/2wzp2vJ
Pulleys: https://amzn.to/3tkTmHQ
Timing Belt: https://amzn.to/38NX1o8
3/8 to 1/4 Adapters: http://amzn.to/2gze3Le
Please note that some links above include Amazon affiliate tags. We will earn a small commission if you click through and purchase an item using these links. The price of the products do not change for you. If you'd like to purchase the items without the affiliate tag, feel free to use the links below.
Motor: https://www.amazon.com/gp/product/B00TK6ULPY
Pulleys: https://www.amazon.com/gp/product/B01G1NBKHQ
Timing Belt: https://www.amazon.com/gp/product/B00YMM6IQW
3/8-1/4 Adapters: https://www.amazon.com/gp/product/B00BJW3082


2 comments
ProAm USA
Hi Isaac,
The motor we demonstrated in the video has a very slow setting that make the dolly move seem to crawl. Most of the slow panning, time-lapse style motors will work great for those super slow shots.
Hi Isaac,
The motor we demonstrated in the video has a very slow setting that make the dolly move seem to crawl. Most of the slow panning, time-lapse style motors will work great for those super slow shots.
Isaac Wei
With respect to changing out motors, for someone rather new to tinkering with electronics, what are the parameters in a motor I should be looking for to be able to achieve a very slow, nearly imperceptible, dolly-in move — say, for a DSLR like a SONY A7s on the track?
Many thanks,
Isaac
With respect to changing out motors, for someone rather new to tinkering with electronics, what are the parameters in a motor I should be looking for to be able to achieve a very slow, nearly imperceptible, dolly-in move — say, for a DSLR like a SONY A7s on the track?
Many thanks,
Isaac