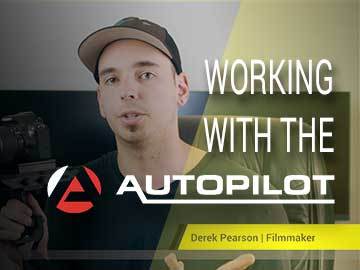
This is Derek here again on behalf of ProAm USA. Today, we’re going to talk about the Autopilot Stabilizer a little bit. I think we all know how difficult it is to get smooth footage, but we also realize how important it is too.
You’ve got a couple of options
You can always mount up to a tripod, slider or something like that, but the Autopilot Stabilizer is going to allow you a lot more versatility to move more freely. Of course, you can get an electronic gimbal or something like that, but the Autopilot is going to be quicker to setup, a lot more affordable and more reliable at the end of the day. You won’t have to worry about batteries dying or a motor failing on you.
My setup
I’ve been shooting with the Autopilot Stabilizer for a couple of weeks now and I’ve been using my Panasonic GH4 with it. The GH4 is a great camera to test the Autopilot’s capabilities since the camera has a small micro 4/3 sensor, is extremely light and is un-stabilized. In short, it’s an inherently difficult camera to stabilize so it’ll really allow us to see what the Autopilot can do. The widest lens I have for my GH4 is a 17mm which I place on a speed booster that ultimately put it around a 24-25mm full frame equivalent field of view. It isn’t a very wide lens at all. However, I was able to get steady shots using this setup.
Practice much?
What’s far more important than any of the gear or lenses you use is your technique. That’s something that I discovered quickly. The most important thing that I can tell you is, if you want to get smooth and professional looking shots, you have to continually practice every chance you get. Your shots probably won’t be spectacularly smooth right out of the gate. In all likelihood, they’ll be swaying all over the place. It’s not something that is easily picked up overnight, regardless of your setup. Practice makes perfect here.
Let’s talk about balancing for a minute
I know this can be intimidating to a lot of people, and it was for me too initially. I was worried that I wouldn’t be able to get it balanced quickly on a paid shoot with time restrictions. I ended up using it on a wedding over the weekend and had it balanced within a couple of minutes. I used the same lens setup on the stabilizer throughout the wedding so I didn’t have to re-balance at any point in time. It really wasn’t as difficult a task as I initially feared it would be. You have a number of different adjustment points available for balancing tweaks. You can slide the sled forwards or sideways and can also adjust the weights on the bottom. The shaft is also telescoping which further allows you to dial in your balance and drop time.
Ok guys, I hope you enjoyed that quick look into the Autopilot Stabilizer and I hope it encourages you to check it out for yourself. If you’re looking to add more production value or be more efficient on your next shoot, this is certainly a piece of gear that I recommend to you.